Instructions
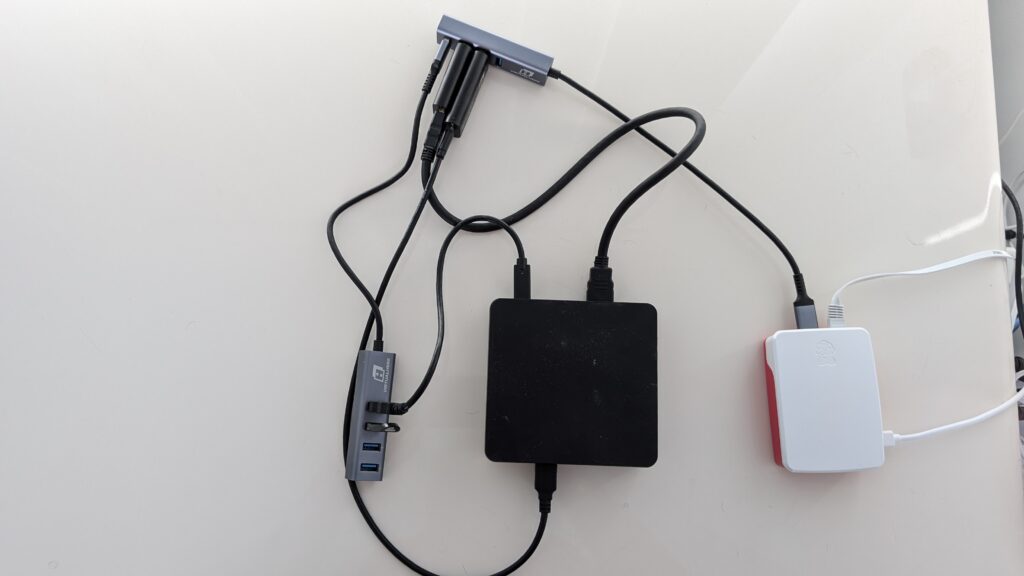
- Plug the VirtualHere USB Hub into a device running purchased VirtualHere Server software. (In the example image below this is a Raspberry Pi 5 running VirtualHere Server – the white box. The target is the black box, an Intel NUC). The server can be a Linux, MacOS or Windows machine that is nearby to the target(s).

2. Plug the Emulator And HDMI Dongle into the USB Hub
3. Plug the HDMI and USB cable from the dongles into the Target machine. (The Target machine in the image above is the black box – an Intel NUC running Ubuntu. This is the machine we want to remotely access and control)
4. Start the VirtualHere client on any remote machine where you want to control the Target. In approx 15 seconds the VirtualHere Server should appear, with the Dongles listed. If you are on a different network than the VirtualHere Server, right click USB Servers->Specify Server->Add and put in the IP address of the VirtualHere Server.
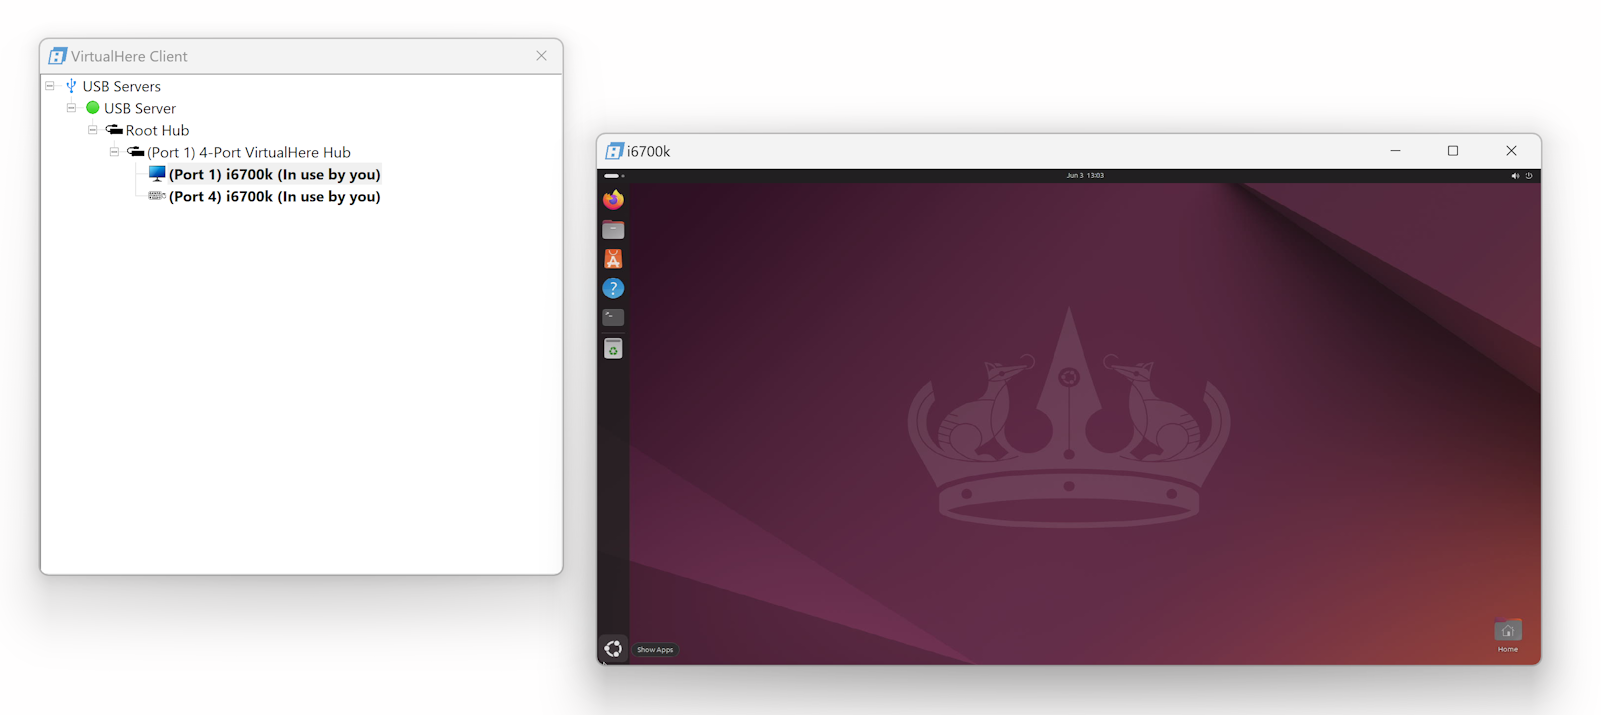
5. Right Click on the KVM Video Dongle and select Use. The Emulator Dongle will also be automatically used.
6. The system will ask for a nickname for the Target which you can set if you want. (In the example above it is i6700k)
The screen of the Target will appear. When you move the mouse or press the keyboard these signals will be sent to the Target machine exactly as if you were sitting in-front of it. There is no need for any software installation on the Target in order to control it – this is the key benefit of this KVM/IP system.
In the VirtualHere Client you can click the window icon at the top left of the Video screen (in Windows), or top right in Linux and MacOS clients, and it will show the various settings for the session. A useful option is the Resolution… setting. That will enable you to down-sample the video if you are on a high-latency network to increase throughput at the expense of Video Quality – on a high latency network (>100ms) the screen might flicker, so this is a good option.
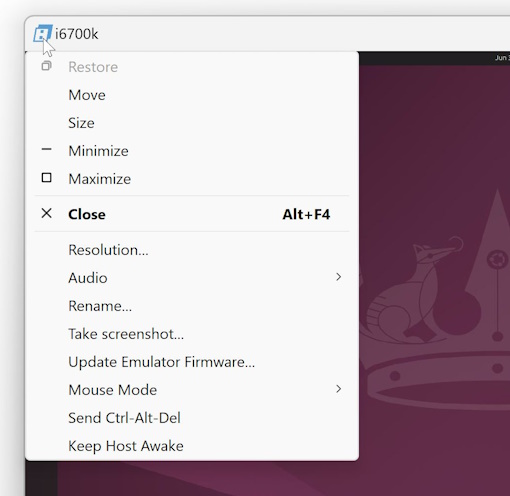
HDMI Audio pass-through is supported for VirtualHere Clients running on Linux and Windows (not MacOS). The Audio option allows you to turn Audio pass-through on, or off (the default), or only when the Window is Active.
Mouse Mode can be switched between Absolute (the default) or Relative (e.g for accessing iDevices or Android devices)
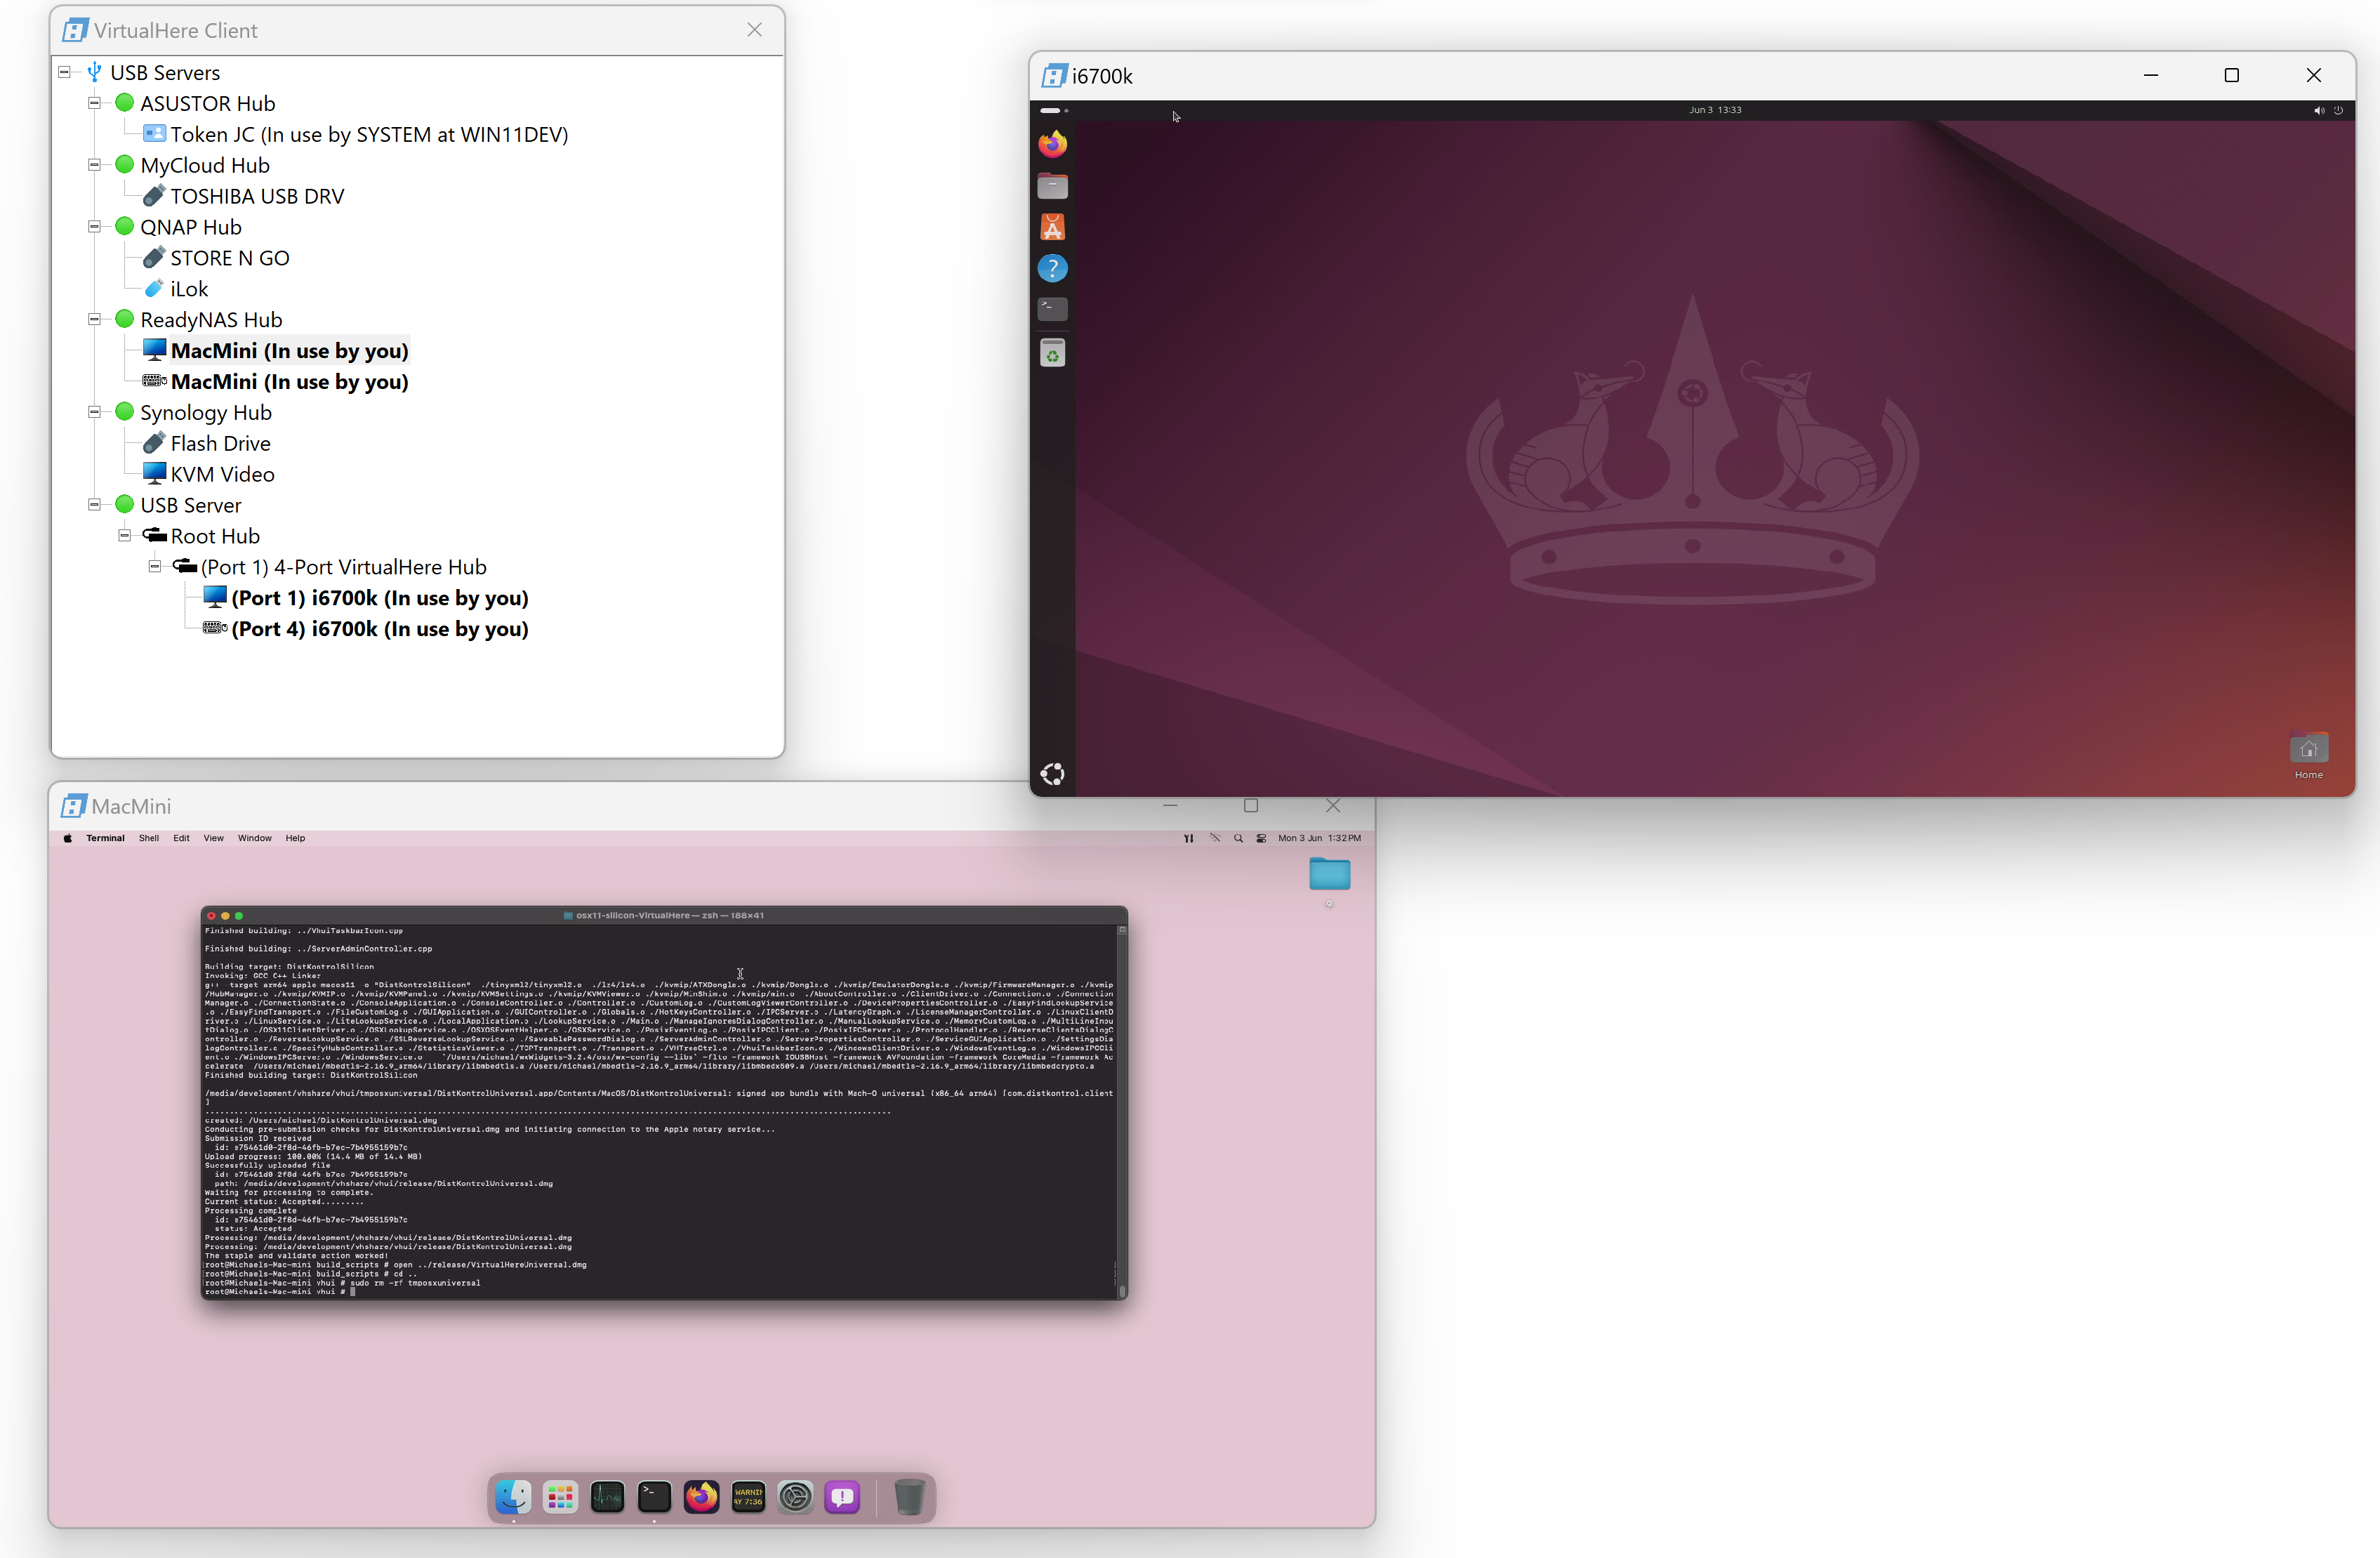
Here is a screenshot of a single machine running VirtualHere client connecting to two different KVM/IP Targets on the network simultaneously. Listed in the VirtualHere client are all the USB Servers on the network. Currently 6 USB servers are listed and two of them have KVM/IP dongles attached to Targets. The i6700k Target is the Ubuntu NUC as shown above and the other Target is a Mac Mini machine elsewhere on the network.
Booting the Target from an ISO image
The VirtualHere Modular KVM/IP system can virtually pass back and forth USB devices from the Server to any VirtualHere client on the network using its built-in USB over IP functionality. However, the VirtualHere USB Hub is unique in that it can also redirect USB devices physically. It can dynamically switch the USB electrical signals to come out of the USB Hub on Port 1, instead of the upstream port.
For example to boot the target with an ISO image (e.g Ventoy). This feature requires two VirtualHere USB Hubs connected to each other.
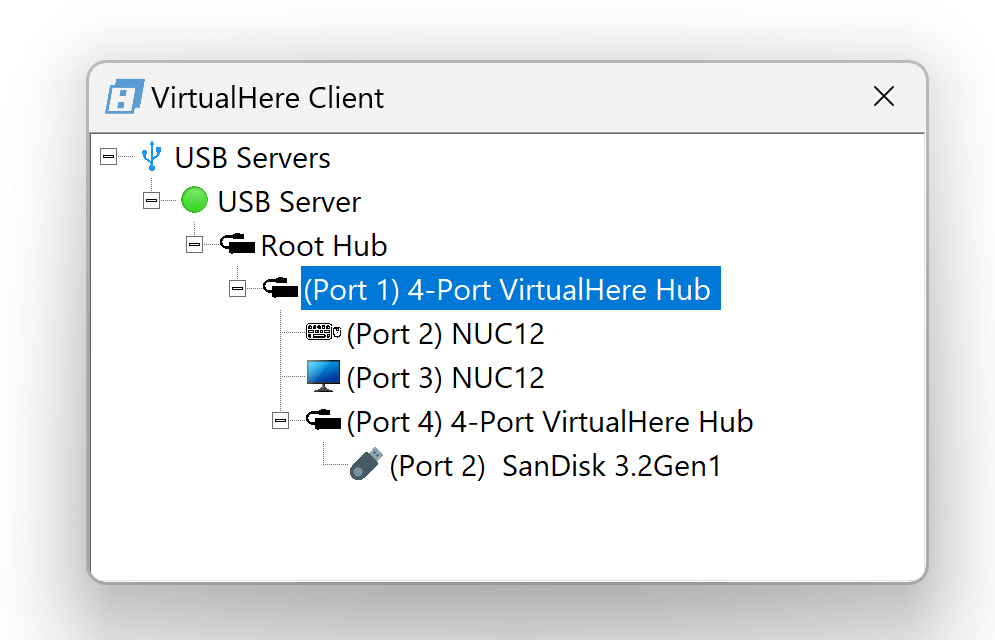
- Plug a USB disk into the VirtualHere USB Hub on port 2, 3, or 4. This disk will the the boot disk for the Target. In the image above, the USB stick is plugged into port two of the (lower left) hub
- Plug this VirtualHere USB Hub into any port on the first hub. In the image above the hub is plugged into port 4 of the first (top) hub.
- Plug a USB 2 A<->C cable from Port 1 of the VirtualHere USB Hub (lower left) into a USB-C port of the Target. (Use a USB-C-A adapter if you only have USB-A ports).
- In the VirtualHere client, right click on the Disk and select Use.
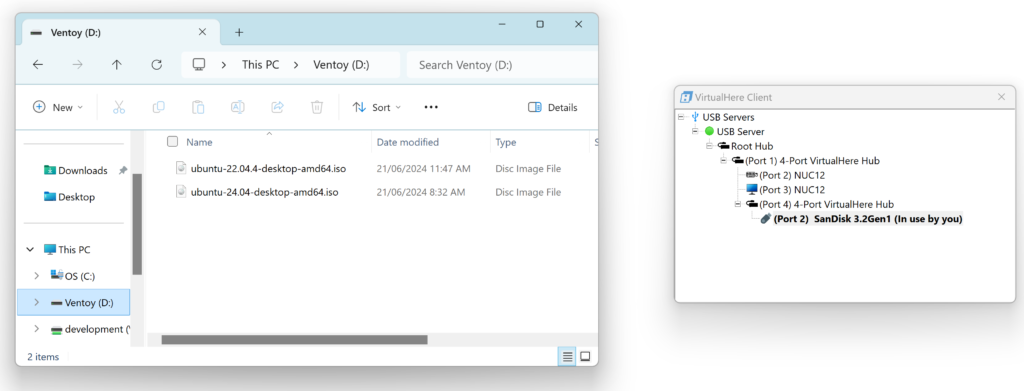
5. This will virtually mount the USB drive on the VirtualHere client machine and you can write/format the USB disk exactly as if it was directly plugged into the client machine. In the example above we have copied over two ISOs – Ubuntu 22.04 and Ubuntu 24.04
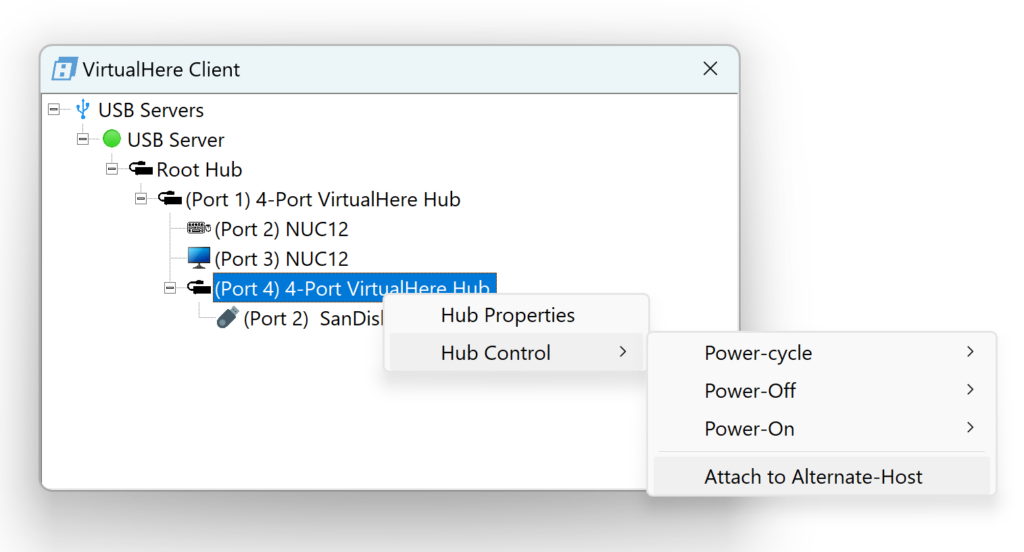
6. Right click on the disk when you have finished copying and select Stop Using. Right click on the USB Server and select “Show Hubs”. Then right click on the lower 4-port VirtualHere Hub and select Hub Control ->Attach to Alternate Host
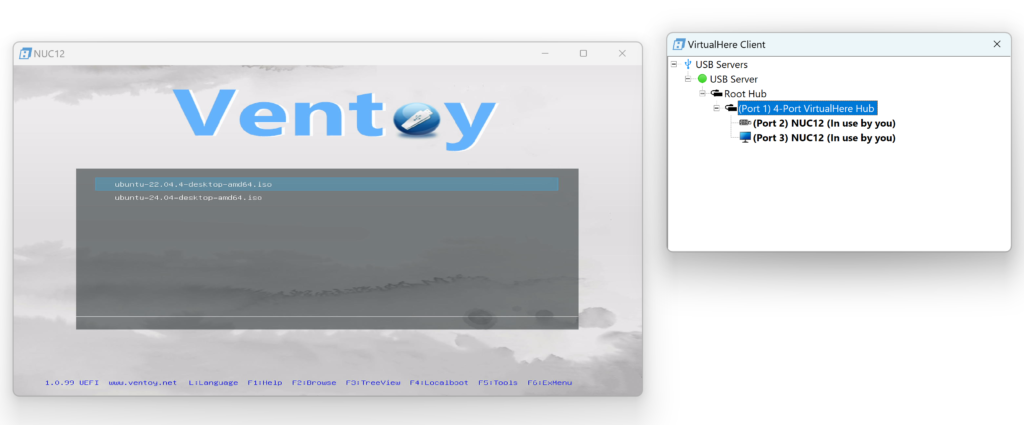
This hub will now be physically attached to the Target machine exactly as if it was directly plugged in. Now turn the Target machine on and since the USB Disk is now attached to the Target it will boot up (in the example below this is the Ventoy boot screen)
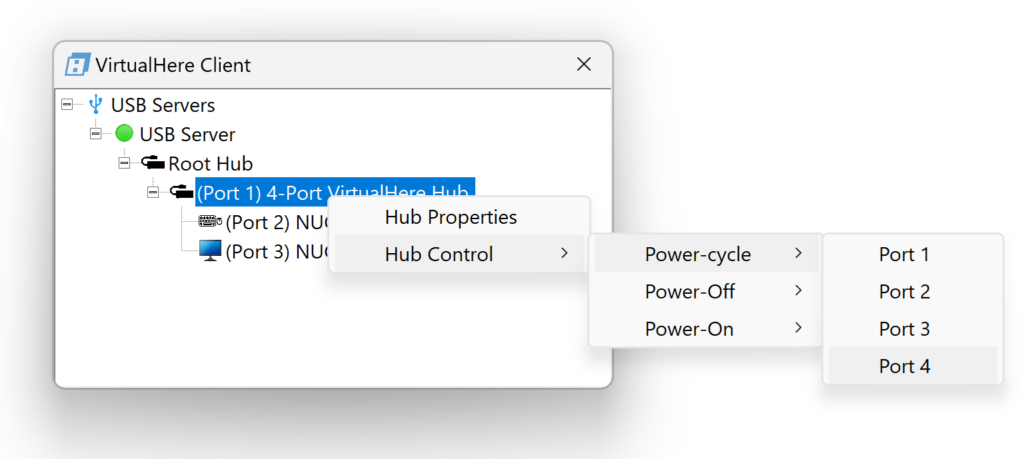
To reconnect the disk back to the original server the USB port needs to be power-cycled. Since the USB Hub is plugged into port 4 of the first hub you just need to power-cycle port 4 like this : Right click on the first Hub->Hub Control->Power Cycle->Port 4.
After a few seconds the hub will be physically reattached to the host as it was before:
Remotely Resetting or Powering On/Off the Target machine
If you purchased the ATX Dongle , plug the jumpers from the dongle into the PC or NUC front-panel header. There are two rows of pins in the ATX dongle. They duplicate the pin signal so you can plug the original header jumpers into the ATX dongle and use the included jumpers to plug the same pins back into the motherboard. This way you can still control the machine via the Front-Panel buttons on the chassis, as well as via the ATX dongle. If you use the video dongle via virtualhere it will also automatically select the relevant ATX Dongle as well. You can control the PC power by clicking on the ATX menu in the KVM session box, or right clicking on the ATX dongle and selecting Short/Long press power.
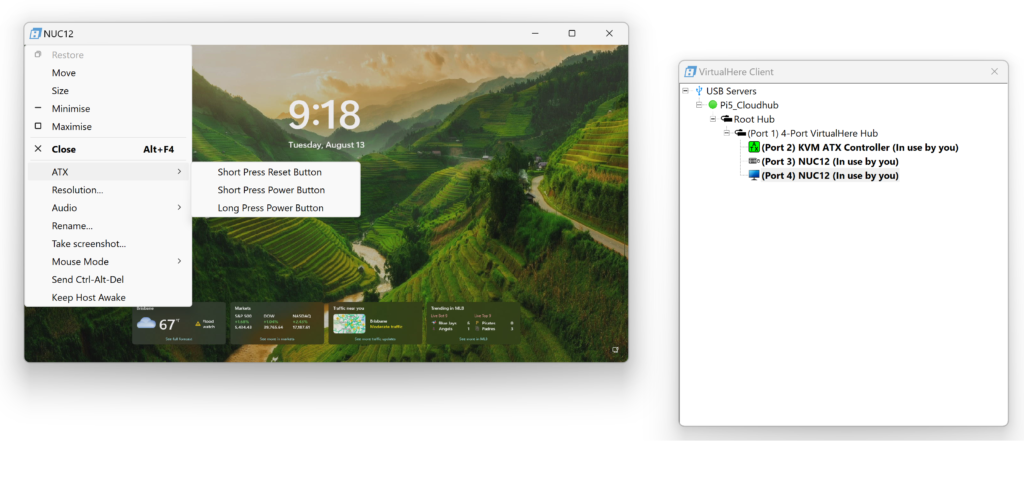
When the Target is powered on, the ATX controller shown in the client will be green. Similarly for Off it will show red. When he target is sleeping, the icon in the VirtualHere Client will pulse between red and green.
Working with KVM Switches
The VirtualHere system can work with any KVM switch which has a USB connection for controlling the source. Most KVM switches have this control port.
Since VirtualHere is a fully functional USB over IP system the switch can be plugged into the USB Server and virtually connected to any VirtualHere client on the network.
When you control the switch via VirtualHere, you can use the software bundled with the switch to communicate with it exactly as if it was directly plugged in. No need for any translation or custom software.
Questions/Feature Requests?
Visit https://www.virtualhere.com/forum/1 or email mail@virtualhere.com if you have any feature requests that you would like be added to this product to help your use case.